OBS Studio aka Open Broadcaster Software Studio is a free and open source video recording and live streaming application. Distributed under GNU GPL v2 license, it’s available for Linux, Mac and Windows and is one of the best screen recorder for Linux. In fact, it’s not just limited to screen recording but is also popular for live streaming!
OBS Studio requires OpenGL3.2 compatible GPU along with X Windows System. The dependency includes FFmpeg before you can install OBS Studio.
Installation
OBS Studio is available in repository for most of the Linux distributions. For Ubuntu users, you can install from the PPA to have the latest copy of it.
Ubuntu
sudo apt install ffmpeg
sudo add-apt-repository ppa:obsproject/obs-studio
sudo apt update
sudo apt install obs-studio
There are unofficial versions available to install for other Linux distributions
Arch / Manjaro
sudo pacman -S obs-studio
Fedora
sudo dnf install https://download1.rpmfusion.org/free/fedora/rpmfusion-free-release-$(rpm -E %fedora).noarch.rpm https://download1.rpmfusion.org/nonfree/fedora/rpmfusion-nonfree-release-$(rpm -E %fedora).noarch.rpm
sudo dnf install obs-studio
There are some more Linux distributions covered, for which the installation instructions can be found here.
Setting up OBS Studio
Once you launch OBS Studio, it runs an auto configuration wizard with different options. You can select your preference of whether to use it for streaming more or just as a screen recorder for your Linux system.

It then asks you about the Video settings, the resolutions you want to use for recording and frame per second settings.

It then goes on to test recording encoder and takes around a min to suggest the best settings. If you are not happy with that, you can update it as you wish.
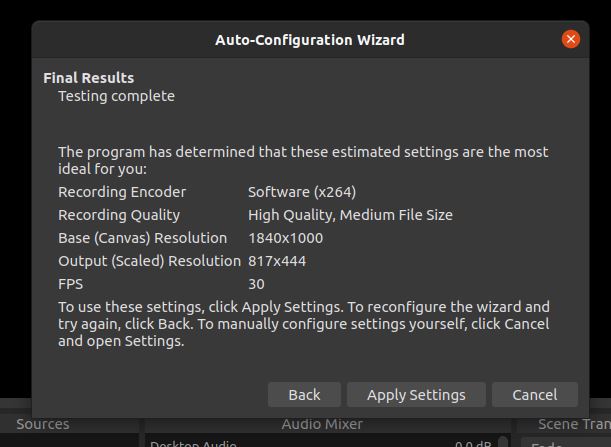
Use OBS Studio as a screen recorder for Linux
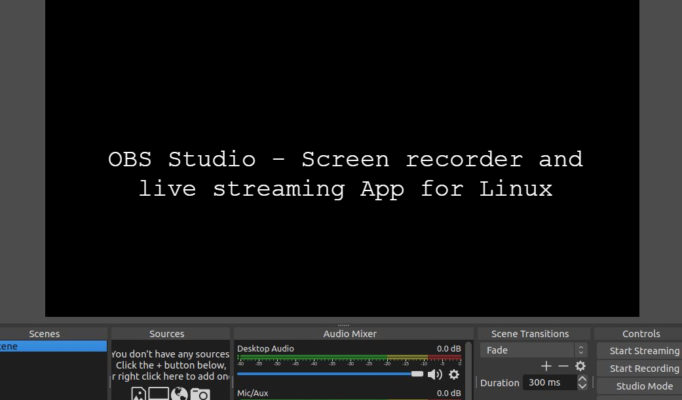
The default screen for OBS Studio looks something like this –
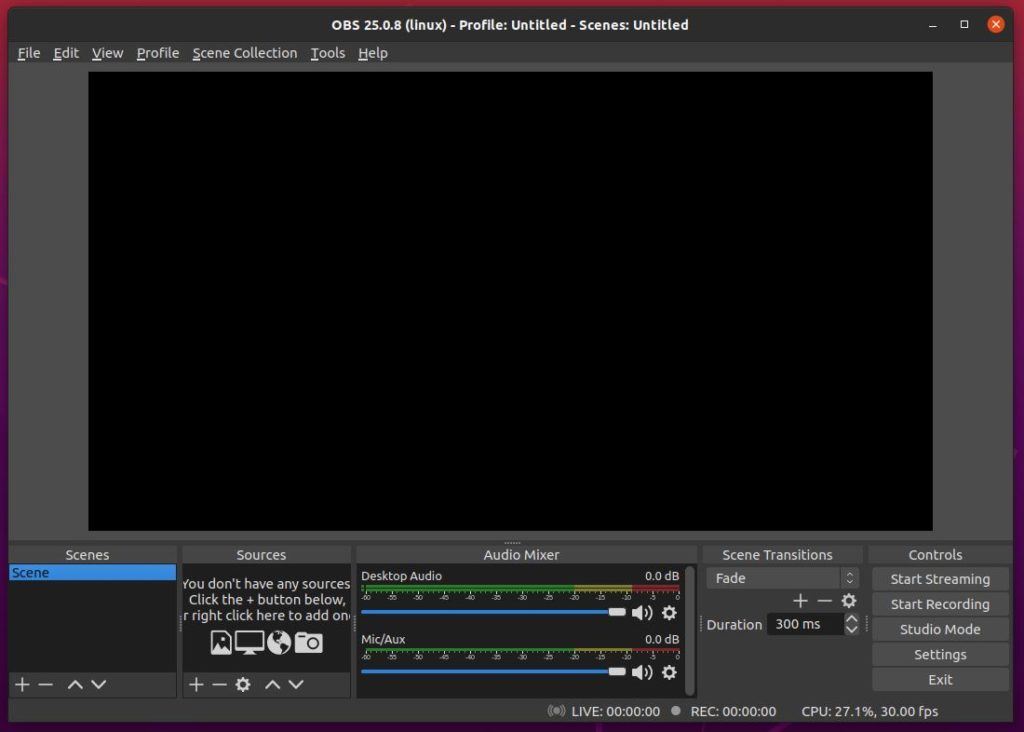
There is a display window where you can render the recording. The bottom panel is separated in 5 columns.
Scenes – A collection of different recording in some sequences. Clicking on + sign creates a Scene where you give it a name and move to sources.
Sources – Click on the + sign to add a sources. It has options for screen capture, window capture. You can even select Video capture device to use your webcam for recording. PulseAudio can be used to record audio through in-built or any external mic.
Audio Mixer – you can use to mix the audio and video you have captured.
Scene transition – to apply an affect between 2 scenes transitions.
Last section has controls to start streaming & recording.
If you are looking for some games to stream, you can try these free steam games for Linux.
Wrapping up
OBS Studio is a decent application for screen recording in Linux environment. It was not high on resource usage though I didn’t test it for much. Have you used it anytime? Let us know your experience in the comments section.
